


At the beginning of the year I always love gifting my students with a little something at Meet the Teacher. For a brand new kinder, many of which are coming to a big new school for the first time, can have all the feelings from excitement to nervousness...and all at the same time. As a way to gently welcome them into our classroom I make these personalized keychains that they can use on their backpacks (or anything they choose!). Boys and girls alike adore them and I know the parents appreciate the sentiment.
So, skip the candy and snacks and opt for this easy peasy DIY student keychain (grab the gift tags here)!
Here's how you make them:
Gather your supplies

Amazon affiliate links used within this post
Materials Needed:
- Alphabet Beads
- Pony Beads in assorted colors
- Keychain clips
- Elastic String (recommended: 1mm in size)
- Scissors
Assembling the Keychains
Step 1: String your beads
Use enough elastic string so that you can string all of the letters in each student's name as well as have room for the colorful pony beads.
Note: my string is a little small for the pony beads (oops!) so I have to tweak how I tie them together. You'll see how I do this at Step 2...
You'll select a few colors of pony beads and begin to string it on as shown...

Then, the trick is to thread both sides of the string through the next pony beads. This will secure the bottom bead onto the keychain (see below).

Step 2: Assemble student letter beads
Next, you are going to thread the letter beads to build your student's name followed by more pony beads. This is where you can get creative with your coloring and style. I kind of chose my colored beads based on whether it's a boy or girl...but it's completely up to you!
Now, this is where I had to get creative. My alpha beads and pony beads are two different widths in terms of their opening. So, I use a heart bead at the end of the keychain to secure it all together. Simply knot it off (making a knot about 3-4 times so the beads don't slip off).

Step 3: Attach to keychain clip
Now that you have a finished keychain all you need to do is knot it around the clip. Again, I knot it about 3-4 times to secure it so the beads don't fall off.

Step 4: Attach to gift tag and hand out!
The final step is to attach the keychain to a cute gift tag and lay them out for Meet the Teacher/Open House. I put them at their seats when they arrive, but you can hand them out at the end. Totally up to you!
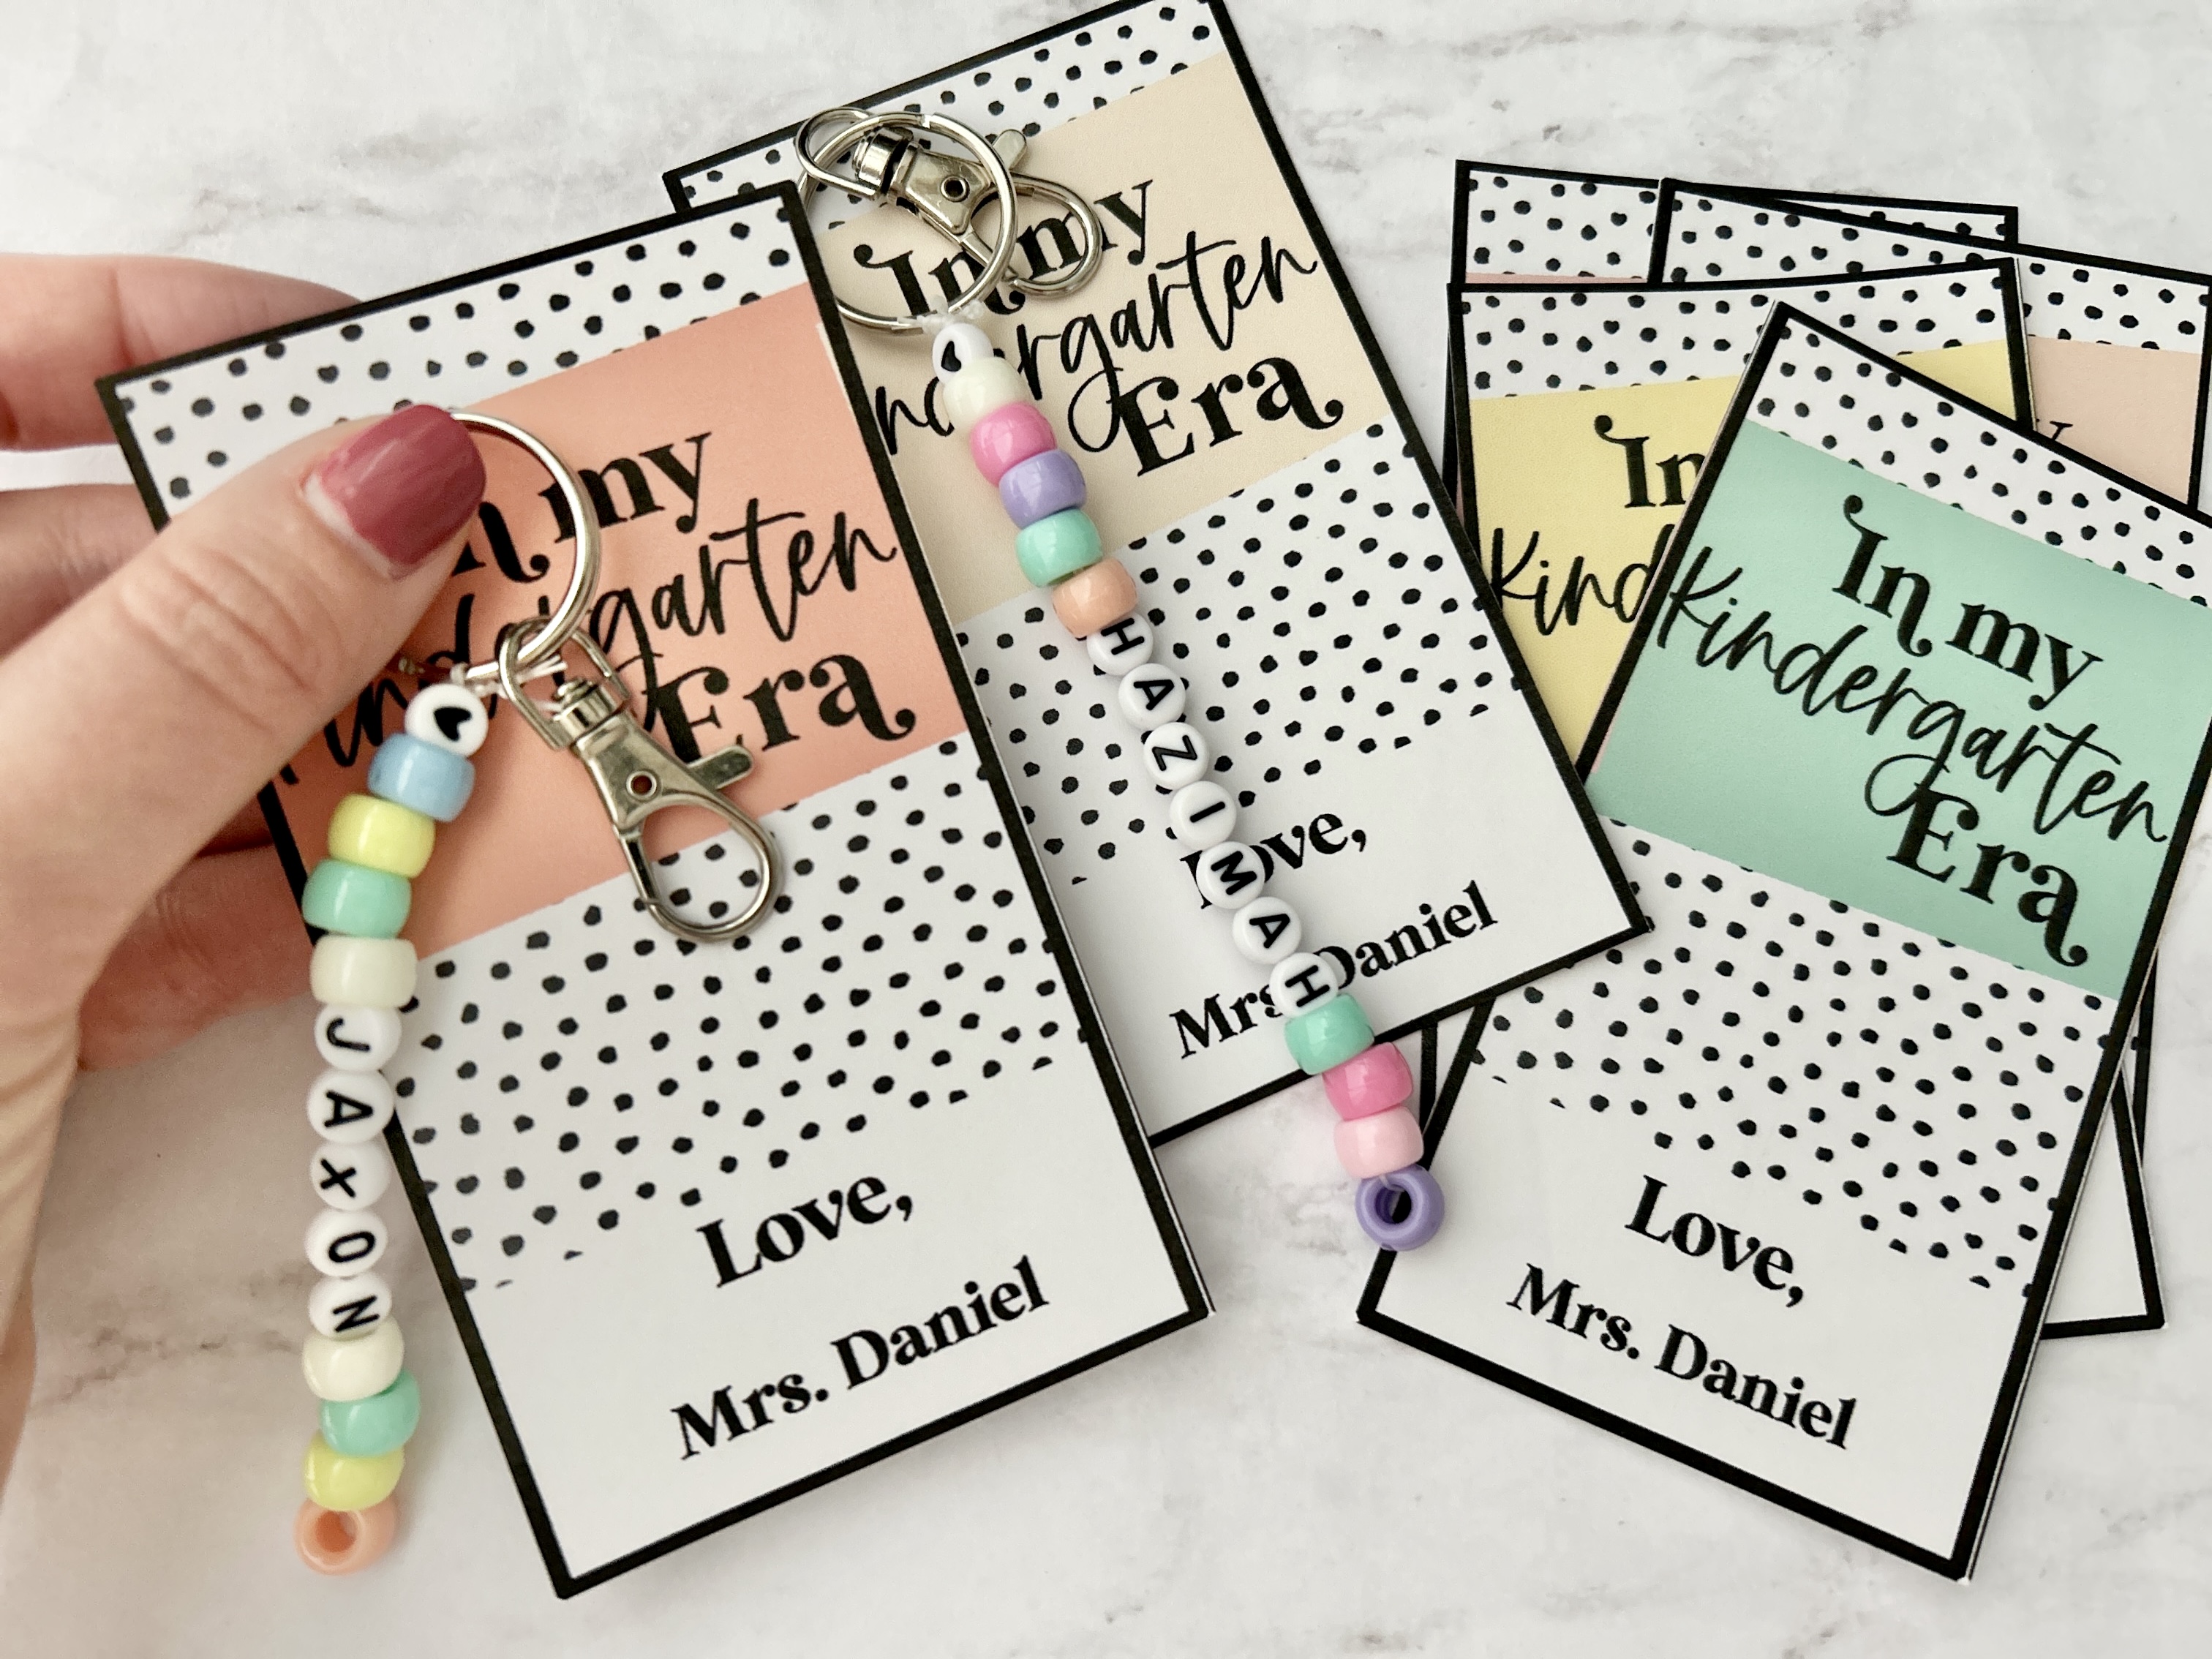
These gift tags are made for Pre-K thru 6th Grade and are editable right in the PDF. Simply type your name and print. You can use a hole-punch and clip your keychain right on!
Recommendations:
- I recommend having your materials on hand at school so that you can quickly make a keychain for any students added last second to your roster.
- I also hold onto any keychains of students who didn't attend Meet the Teacher/Open House. I'll make sure to lay them out on the first day of school.
I hope you enjoy your new school year and...happy teaching!

