
January 19, 2019
A Letter Study: M

This week I'm introducing my students to the letter M!
Since EAK is mostly an exposure-based curriculum, I enjoy finding fun projects for my kids to explore the letter of the week an it's sound. Today, we made these fun and easy to pull together moon pictures using coffee filters, a black marker, and a spray bottle of water! It didn't take much for my class to create these fun art pieces - just wait a few minutes for the paper filter to dry and it's ready to glue!
 |
| photo source: Create Art with Me |
Moon Painting - experimental activity
I preface this with the fact that this is 100% an experimental activity that I introduced this week. I'm letting them dry over the weekend to see if they turn out the way I was hoping. I took the recipe for Moon Rocks and accidentally added too much water, so I added some flour to the baking soda mixture and it thickened. I didn't want to waste what I had created so I gave my kids some brushes and instructed them to paint the backside of a small paper plate. Ta da! Moon painting!
Stay tuned for how they dried! I'm hoping they turn out looking great!


A little review and writing practice with my kiddos on Friday about the main facts they learned about the moon. Instead of leaving it blank, I made dots for the kids to trace to make the word.
Now, let's take a peek at the different learning stations I had this week to help reinforce various concepts like colors, shapes, and Eric Carle!
Learning Stations
Fruit Loop Fine Motor
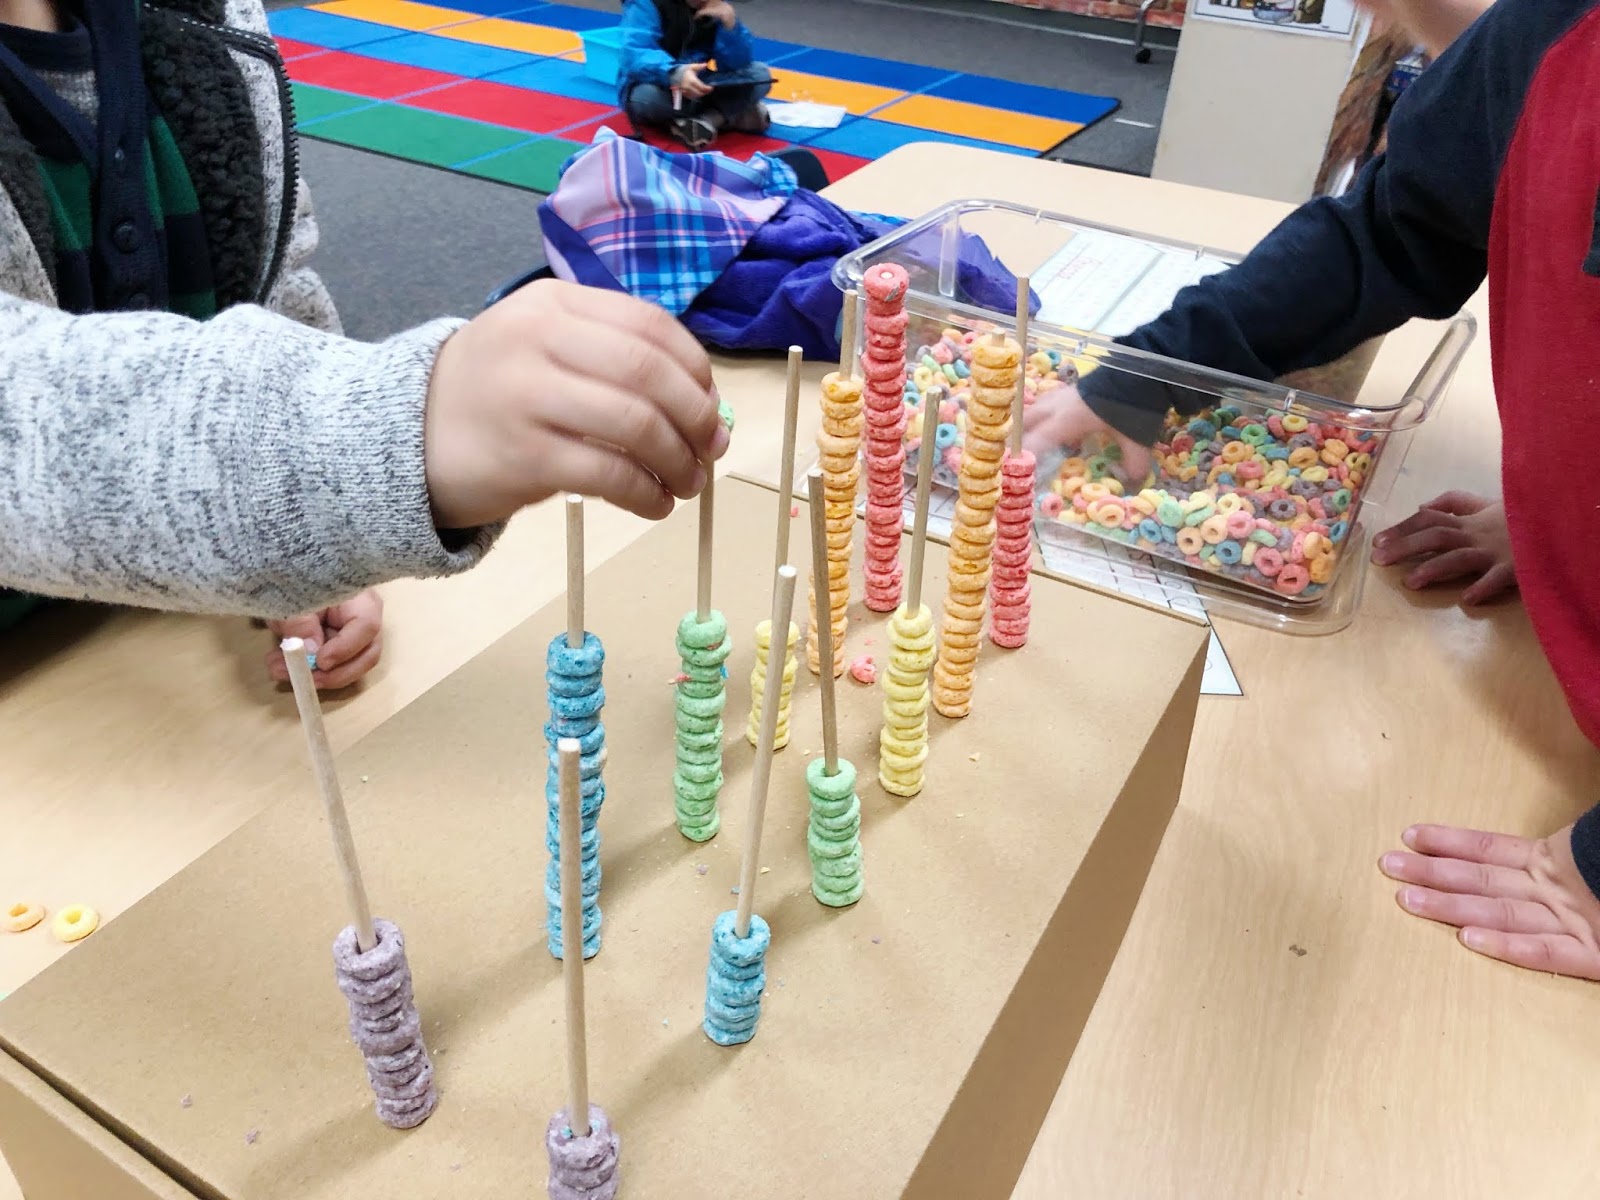
We reviewed colors with this super fun Fruit Loop fine motor activity! The kids really enjoyed working with cereal (after much review on how we don't eat them!) in this center and did such a great job identifying their colors. I picked up this idea for my classroom from the blog Play to Learn Preschool and it was super simple to set up. I used an old cardboard shipping box since I couldn't get my hands on styrofoam right away and skewers from our grocery butcher (for free!) to pull this center together. I placed one color loop on each skewer to model for the kids how they should sort them. By the second day they got it down!
QR Code Story Station

I was most looking forward to sharing this center with my students this week. I've created a little booklet that incorporates QR codes for students to scan in order to listen to stories being read to them. They've done so well using the QR code reader app - I just wish I had more tablets!
My plan is to create more booklets for the different themes we're learning about this year. I found that the kids cycle through the stories fairly quickly, so I'm on the hunt for longer and more engaging videos for them to learn from!
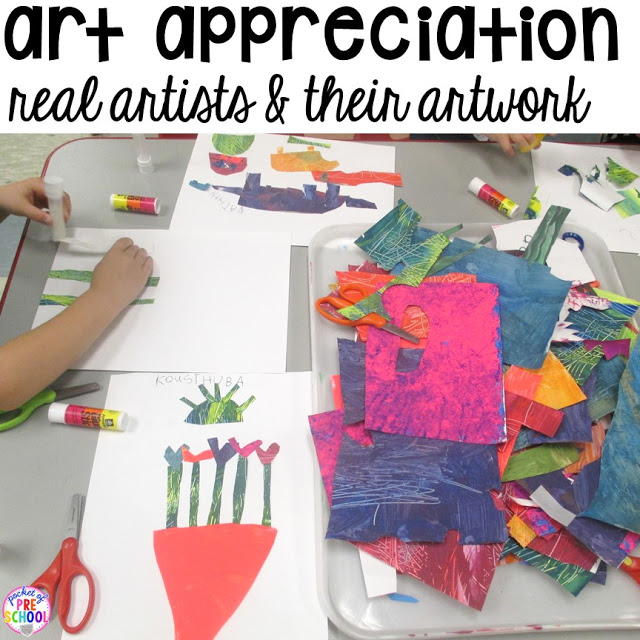
Eric Carle Artist Study

Each week or so I plan to introduce my kids to a different style of art or process of creation for our Maker Station. This week it's all about Eric Carle!
First, I have students simply paint onto construction paper, then use different materials like craft sticks and sponges to add texture to the paint. Once it dries, the next day they cut the paper to make their very own Eric Carle-style picture! I can't wait to see what students come up with!
Kinetic Sand

Kinetic sand is always a good time for my littles! They love exploring how to use it and this week I gave them shapes to make. I'm still on the lookout for fun sensory play items that engage them, but without having an official sensory table I'm somewhat limited in the sensory items I can have them play with.
If You Give a Moose a Muffin: A Letter Study

I've officially survived my second week into our EAK school year and with 2-3 days of rain and being stuck indoors has me with a sense of cabin fever! I'm so thankful for this 3-day weekend, which is giving me the chance to relax and recharge before heading back and into our third week!
This past week my class has been working hard on identifying the letter M! We've explored the moon and yesterday we read the popular story, If You Gave a Moose a Muffin by Laura Numeroff.
Moose Craftivity

One of the crafts my kiddos completed were these "M is for moose" handprints. During their rest time I called students back to trace their foot. Once I had those cut out I called them again to paint their hands brown and make these adorable antlers. I'm so happy with how well they each came out and quite proud of myself for getting it done without the help of an assistant!

Afterwards I invited them during their centers time to finalize their project with a tracing of the letter M. I quickly realized that when giving them practice handwriting pages they weren't confident enough to create letters on their own. So, I used a handwriting page I plan on using next week underneath the paper to help assist them in forming their letters. The final piece looks great and I love that each one looks a little different from another.
Muffin Counting
To finish off our story I found this super adorable (and easy to prep!) craft that incorporates counting and writing numbers. I was pleased to see that my littles had a good understanding of counting!

To make these I made a simple muffin template and used it as a stencil to make the others. I folded brown paper and stapled them together so when I cut out the template I could make multiples quickly - I then made a yellow template for the muffin wrapping. I verbally directed my students step-by-step on how to glue the pieces together. Afterwards I gave each table dot paints to create their blackberries.
I modeled that I was thinking of a number 1-10 only and helped direct them to using their name tags where I had the numbers 1-10 printed. I modeled how to use my finger to count each number 1:1 and when I landed on the number I wanted for my blackberries I would copy that onto my paper.
Again, I was impressed that many of my students correctly counted their dots and saw many of them using their name tags to copy the form of their desired number.
January 13, 2019
Classroom Connection: Learning Station Activities

I'm officially heading into week 2 of EAK (early admitting kindergarten) with my littles and I can't believe that in just four days they have been great working in the different stations I've introduced. Each day last week I shared various stations where students will be learning in and gave them time to practice as a whole group. This way I could slowly roll out the different materials and tools and discuss the proper and improper way to use them at each center. Although there's still a lot of reinforcement with behavior in my class, it's nice to know I can begin having them play in their chosen stations and them be engaged the whole time.
This week I have a ton of new center activities planned and thought it would be fun to share a peek into what our week will look like at each center! We're still with our "Welcome to EAK" theme for the next three weeks so none of my centers have a specific theme, but be on the lookout for "All About Me" coming up in just a couple of weeks! So, here's what I've got:
Sensory Station
This week I'm using kinetic sand and after briefly sharing it with a few of my students last week I know the rest of the class is going to have a great time using it! I am so thankful that one of my Donors Choose projects were funded and now my sensory station has the use of kinetic sand!
 |
| photo source: And Next Comes L |
This week I'll have my students use the sand with cups to fill and mold with using different shapes. There are so many ways kinetic sand can be used and I just love I now have it to use with my kids!
Discovery Station
This station is kind of my misc station and I did that with intention. This is going to flip back and forth between being my math/science center and I wanted to give it a name that would lend itself to both - but also be a little mysterious to invite my littles to want to play there.

This week I am combining a fine motor activity with color sorting with this Fruit Loop color sorting activity from Play to Learn Preschool! Jamie uses this in her class to create a graph, but I intend to use this concept to reinforce colors and sorting. I love how easy and inexpensive the materials are to pull it together AND the vertical skewers to place the loops are a fun way to sort them versus a flat mat.
Writing Station
In our writing station I will place various activities that relate to having students write/draw, practice letter formation, or otherwise practice their fine motor control. This week I have play-doh and letter stamps, which I am going to have the kids practice writing their names and the names of their classmates!
 |
| photo source: Simply Learning Instagram |

Another amazing donation to our class from our latest project being funded at Donors Choose - these dough stampers from Lakeshore!
Reading Station
The reading station in our classroom is more than just books! I have found that my kiddos do enjoy looking through the books we have in our class library, but I quickly realized that I needed to add a few pocket chart activities that help them practice their letter recognition.
This week I plan to introduce this Alphabet Sandwich Sort activity where students are to match the uppercase letter to the corresponding lowercase letter. The sandwich clip art is just so cute and I love how they looked when printed and laminated!

Story Station
This learning station in my classroom is the listening center. My class is limited in terms of technology that's available and I wanted to make sure there was an area where they could listen to stories. So, I've created these ring booklets using QR codes to directly link to read alouds I've found on YouTube.

However, I dislike using YouTube in the classroom due to the number of inappropriate ads or automatic plays to other videos. Plus there's always the risk of students browsing YouTube without me knowing and I simply don't even want there to be an opportunity of that happening. So, I use Safe Share!
Safe Share is a free site where you can plug in the URL of YouTube or Vimeo videos and it automatically removes inappropriate content and advertising! I've been using it to share all kinds of videos with my students this year and appreciate that I can provide educational videos without all of the other stuff.
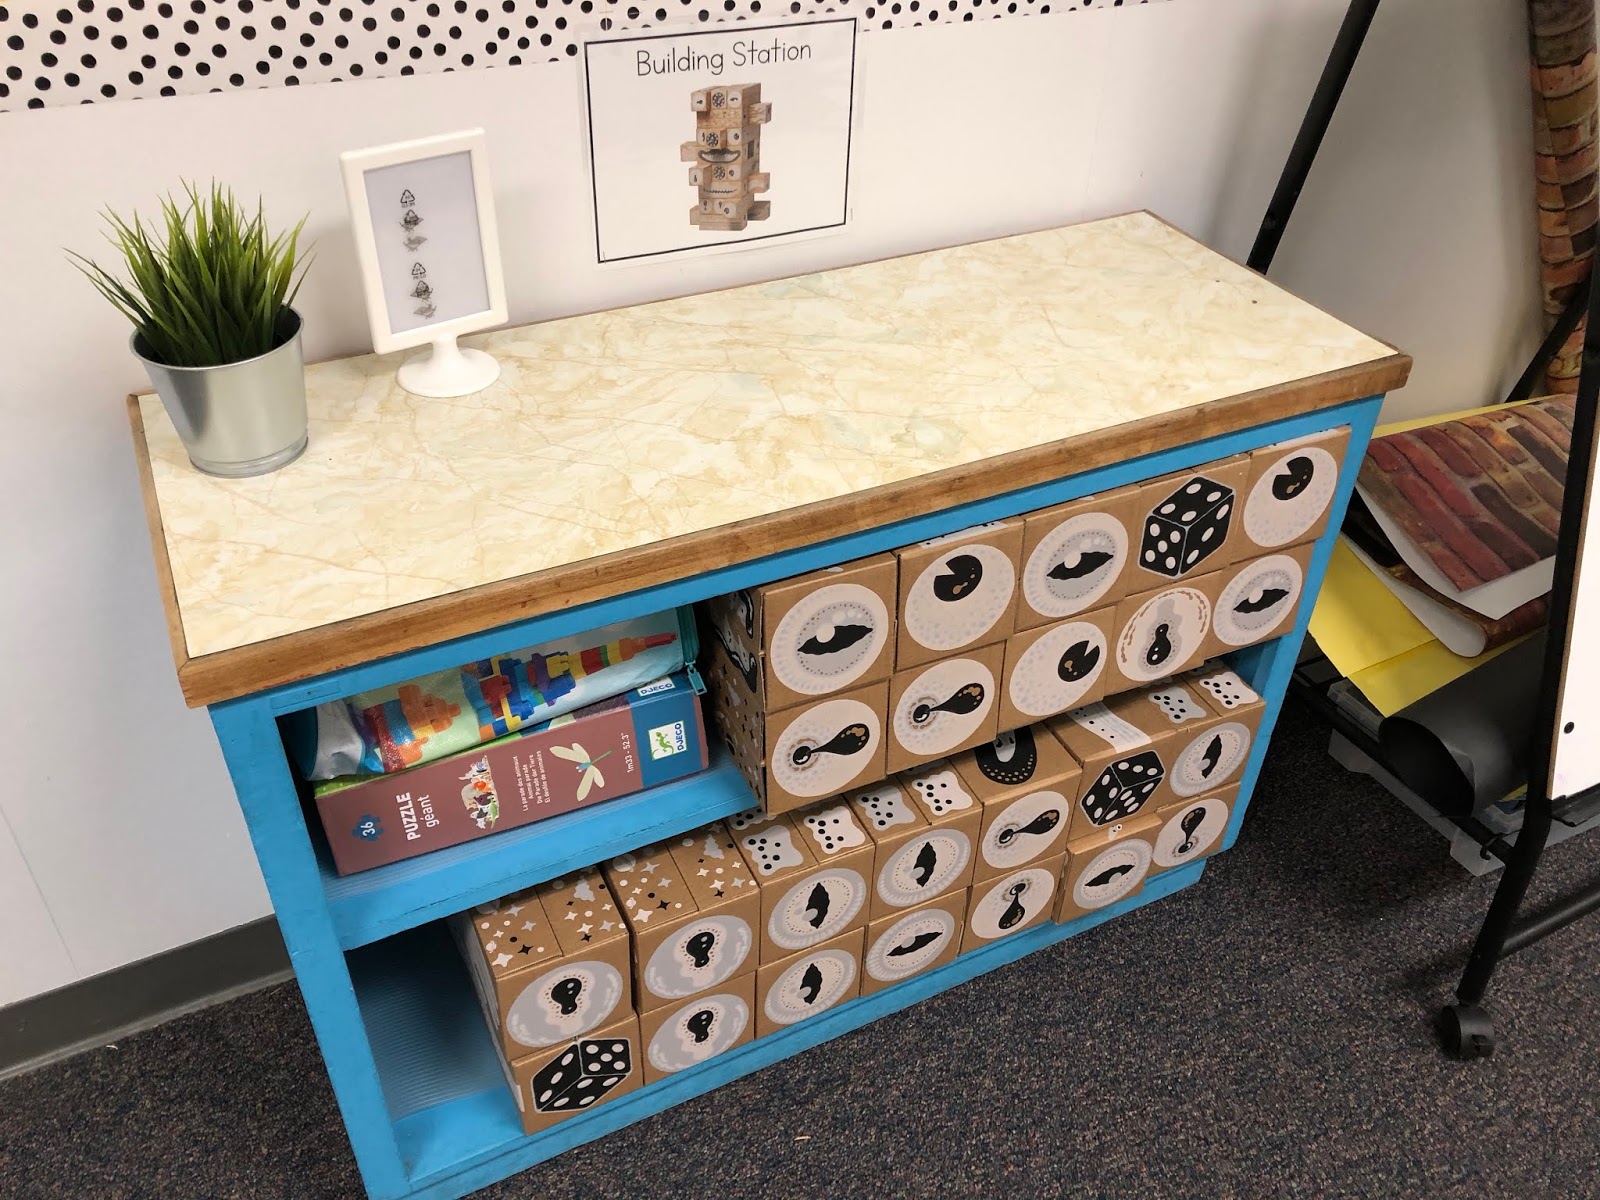
Building Station
 |
| photo source: Confessions of a Homeschooler |
I named our block area the building station because I want it to be more than just using the big blocks. In this station I plan to incorporate a lot of STEM activities and challenges for my littles and this week I'm introducing smaller block manipulatives.
I found these amazingly FREE block pattern cards, which I printed and laminated for my kiddos to use. I love how simple they are, but challenges them to use the correct shape to make the given design. Finding free, but amazing quality, resources for the classroom is such a great little find and I am very appreciative of the Confessions of a Homeschooler blog for making and providing them free of charge for people. It really helps me stock my new classroom full of engaging activities!

Also, I plan to use our MegaBlocks with more intention this week versus the free play from last week. I made these easy DIY "I can build..." cards that feature different designs for them to follow. I'm curious to see how they do!
Maker Station
For our craft/art station this week I am going to introduce different artists and will begin with Eric Carle. I love his style of artwork in his stories and loved this idea from Pocket of Preschool where the kids first paint on construction paper then cut them into strips to create their own art using a similar paint style as Eric Carle!
I can't wait to kickoff another fun week with my little learners!
January 11, 2019
Back to School in EAK

What a whirlwind these last couple of days of school have been!
The first day in EAK had me feeling mentally exhausted by 3pm and for good reason. As a second grade teacher who has begun teaching 4-5 year olds it took me a bit to get adjusted to this age group. There was a lot of shouting out, interrupting, asking "when's playtime" 300 times, and busy bodies - all of which are completely normal for these kiddos.
My class is a unique program where our district offers those who missed the birthday cutoff to enjoy 6 months of "school" before enrolling in full-day kindergarten in the fall. I originally had 20 students, but today am at 18 with a new student starting tomorrow. It's quite a handful to have this many 4-5 year olds without an assistant, but much like the kids...I'm finding my groove and anticipating what my students need. I'm excited to share this year with my students in hopes that their time with me will help develop them socially, emotionally, behaviorally, and if they know how to hold a pencil and write their names by the end I'll consider it a major success.
Here's a tiny peek into some of the fun activities we've done these last two days!
Morning Meeting

- We turn to face each other when greeting.
- We say "good morning, _______" or some other fun variation like "hello" in another language.
- We give a high five, handshake, or some other variation.
- We practice remember each other's names.
I got these different ideas for morning meeting from the Responsive Classroom text, The Morning Meeting Book.
Introducing Center Procedures
Each day I have been slowly introducing my littles to the centers, or "stations" as I call them, and the materials or tools they'll be using in each. Today, which was our second day of school, I introduced them to the Maker Station where I intend to have various art or other STEM activities for them to do once we're ready to run multiple stations at a time.
As a whole group practice I had planned an activity where students decorate a wooden frame (which you can get at Michaels' for $1 each!) using art materials like crayons, markers, glue, and fun sequins and jewels. Another major material I introduced to them was paint! I was a little nervous, but today I had them only working with two colors and Q-Tips for dabbing with. This really kept the mess to a minimum and I was super proud of how well they did!
Skill: fine motor, following directions, process art vs product art, being respectful with art materials, sharing, etc.

To begin, I used the document camera to model how to decorate the outer frame using crayons, markers, and paint with the Q-Tips. I explained how we take care of our art materials and that we use them with a given purpose (and to put tops back on, etc.). They all really seemed to understand and it was demonstrated today by their level of participation and engagement, but also their enthusiasm for "finally" getting to use paint.
I also explained that when using these supplies they are going to be sharing. So, we've really been discussing a lot on being kind with our words and expressing what we want respectfully. Again, I couldn't be more proud of how willing they are to work together and share.

As you can see, I use their table caddies to hold the supplies I've introduced. On the first day I only gave them pencils and today I added crayons, markers, and glue to them - eventually I'll do a lesson on scissors but not yet! I will use the gray trays in centers as a work space for individual students, but for today they held our jewels.

I'm always fascinated with how kids manage to work around each other! Haha!

Through this activity I was able to get a glimpse as to the personality and nature of each of my littles. Some went to town with the supplies given today and others were very meticulous about the placement of each decoration. It's so much fun to sit back and just let students create without any boundaries.

A great story to read before introducing an art center! My kids really enjoyed it and it was great to get to discuss with them how each piece of their artwork has value and that it's important we say kind things about each other. A lovely way to openly discuss both concepts!
Letter A Work
This week I've also tucked in some handwriting and letter recognition into our practice of centers. All week students have been practicing on their pencil grips and working with the letter A. Here's a photo of when I called students up to search for the letter "Aa" in the names of students in class. I did this as a wrap up activity after working together on a practice work page.

Rest Time Procedures
During the last half of the day our class has a rest period of about 20-30 minutes. This gives my littles a chance to quiet and calm their bodies since our program runs a full day.

A couple of tips I've learned along the way for this period have been:
- Request yoga mats to be brought in - they're way more comfy than the hard floor.
- I have a cabinet just for their rest items like blankets and lovies from home. These go home every Friday and come back on Monday.
During this time students may:
- Nap.
- Quietly lay down.
- Read quietly on their mats.
Visualizers
I got this recommendation from a fellow EAK teacher at another school in my district and thought to try it out and absolutely love it! Visualizers on YouTube are 20-30 minute videos of streaming lights and movement that are meant to be mesmerizing to watch. They tend to have club music on them, so I turn the volume off on the video itself and play Pandora classical music in the background.
All in all it's been a pretty great week, but an exhausting one! I can't wait to continue sharing what we've been up to so stay tuned for week 2 next week!
All in all it's been a pretty great week, but an exhausting one! I can't wait to continue sharing what we've been up to so stay tuned for week 2 next week!
January 5, 2019
EAK Room Reveal 2019!
Whenever a new school year begins there is always one major item on my to-do list and that is to get my classroom set up and organized. Once I have done this, for some reason my mind can really focus on the other big things like lesson planning and preparing the first week's materials.
EAK is not a year-round 'grade', but rather a program that runs from January to the end of the school year in June. This is a great first school experience for little kiddos that have missed the birthday cut-off for other programs like preschool, TK, or even Kindergarten. This year I have 19 four year olds that will be attending school for the first time so creating a space that was effective and functional was key.
Amazon affiliate links are used within this post where I can earn a small commission if you make a purchase using my links. All opinions are 100% mine.
Teacher Desk & Meeting Area
One of the most used areas in my classroom will be our meeting area. My walls are not cinderblock, so I was able to buy brick pattered paper from Lakeshore and staple it to the bottom of my board to give a more homey feel. I love how it turned out and even continued the brick along the back of my bookshelf where I intend to place the play kitchen and other dramatic play center items.

Since EAK has very little funding, I didn't have much to choose from in the way of a classroom rug or even furniture. So, I took a little trip to Ikea and found this amazing square rug on sale for $50 (a steal when originally it was $78-80)! Although it's not quite large enough for the space or the number of kids I have, it does work as a meeting area and distinguishes it as a space. My plan is to seat students around the edges but will adapt my seating once the first week begins.
Teacher Hack: Use a magnetic curtain rod to hold your anchor charts!


Pre-K Schedule Cards (adapted from these Daily Schedule Cards)
Building Station
This is my block center and where I will place items that are meant for STEM or other building projects. This was the only other bookcase I could find that was available in a storage room and the blue is perfect for our room! I wish it was a little longer or had more storage, but I'll take what I can get!
And I wasn't given any block center materials like, you know, blocks...so I bought these fun cardboard building blocks from Ikea! And from the Facebook Marketplace I found Mega Blocks for cheap and this large floor puzzle is actually my son's.
Ikea: blocks
Sink/Maker Station
This area of the classroom I've dedicated to the Maker Station. At this station students will work with art/craft/STEA(art)M activities that I've set out each day/week. It's also a place where students can clean themselves or get a drink of water. I've included picture cue cards for my little guys to help remind them of the rules of using the sink and where to locate each thing such as the sink, soap, paper towels, and trash.
I do plan to take photos of the kids representing good behavior for station work time and posting them in the various areas of my classroom. This will help them take ownership of their behavior and really encourage independence by having these picture cues.


Writing Station
It's never too soon to have a writing station in a pre-k classroom! At this station I will have letter or name practice writing sheets and other activities like play-doh mats or other fun games. These materials will be kept here, but students will use the trays at the table as a work space.

Amazon: Trays

Target $1 Spot: bunting, ABC dry erase books

Here's a better view standing from the sink area of my classroom. I'm thankful for the space and even though 90% of my classroom was funded by me, I'm happy with how well it came together.
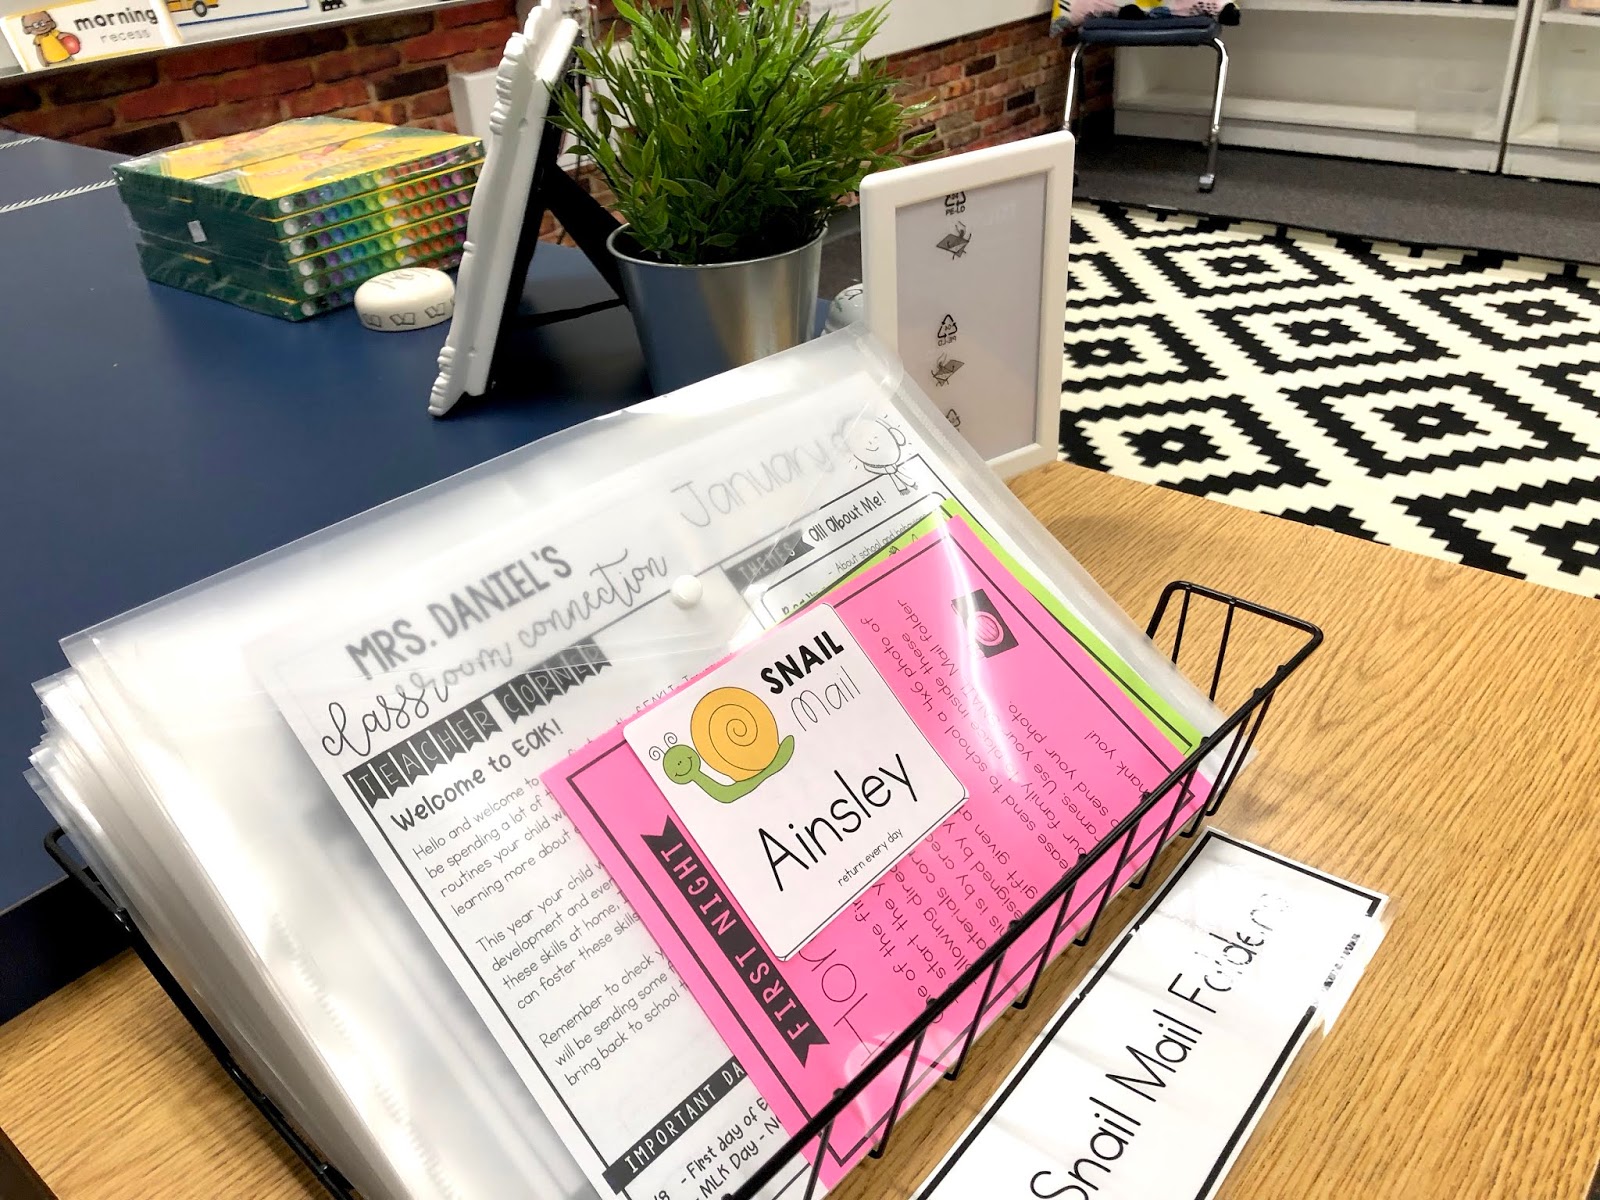
SNAIL Mail Folders
I'm calling my take-home folders SNAIL Mail because it stands for what will be sent home in them:
S - School work from the week
N - Newsletters
A - Activities to explore at home
I - Important class and school information
L - Letters from me or to me
My school gave me green paper folders but I've decided to use them instead for the parent take home folder at orientation. I've found having transparent plastic folders survive much better and parents check it more often when it's see through. :)
Amazon: clear plastic folders, labels

Orientation
On Monday after some staff PD at our school my class will have a parent EAK orientation where the families get to come into the classroom, meet me, and get an overview of our curriculum and school year. I always really enjoy this time with the parents because it gives me a chance to make an impression on them and relay helpful information about what to expect. Especially being a mom now, I understand the emotions that a parent goes through when sending their child off to school for the first time!

Lakeshore: Name Lanyards
I found this cute poem online and adapted it for our EAK classroom. I thought it would be a nice sentiment to share with my incoming families who are sending their child off to school for the very first time.
When it came to the desk name tags I kept finding tags that were too busy with information that we would rarely use in our classroom so I designed my own. Each name tags has room for either a first and last name, but considering these kiddos are learning to spell their names I - of course - only wrote first names on them. Then there's a simple alphabet with upper and lowercase letters and finally just a reminder of right and left. That's it! Simple, simple, simple...
Lastly, on their desks for the first day I've included these lanyards that have each student's name and what room we're in just in case they get lost. It will also help me remember names for the first few days of school!

Inside each folder I have information that is included in my presentation for parents to look over while I'm talking and again at home. I've included some helpful infographics about purposeful play, tips on fostering behavior at home, and some ideas on how to reinforce the learning that's happening at school at home. Another great tool I utilize at the beginning of any year is gathering information about the student and family. I've adapted my BTS Parent Packet specifically for my EAK class, but can be helpful for any preschool or pre-k grade!
And that's it!
I couldn't be more nervous and excited since this will be my very first year teaching such a unique 'grade' like EAK. However, I know everything will work itself out and one of the biggest lessons I've learned over the years in my teaching career is to just embrace the chaos and lean into it all!
Stay tuned these next six months to see what all we're up to in EAK!
January 1, 2019
Why Supporting Classrooms Should Be Everyone's Priority in 2019

One of the most charitable things a person could do is to invest in the classrooms in their communities. A lot of my friends and family aren't aware that there are plenty of places where they can help support teachers and their students through online donations. These donations can be financial, but by simply offering gently used items like children's books, furniture, play kitchens and the like really help alleviate the cost that many teachers use out of their very own paychecks and pockets.
Tomorrow I officially start my very first days as an EAK teacher - setting up my classroom the best I can and attending staff development in attempts to feel prepared for when 20 four year olds arrive next week when class resumes. However excited as I am for this new adventure in my teaching career, I have accepted a position that has little to no funding and in order to offer my students the learning experiences they deserve, especially living in a low-income community, I need the resources to do just that.
With that being said, as we all ring in the new year and set new goals for ourselves, I ask for you to consider supporting just one classroom this year - even if it isn't mine. Your support will mean so much to that teacher because it means they're making their curriculum more accessible to their students.
Here are a couple of ways you can help support a classroom in your own community or the teacher friend or loved one in your life!
Donations of gently used toys or materials
Especially working with such a young age-group, teachers of preschool or even kindergarten need play items for their students like blocks, Legos, dress-up clothes, and other toys that could be used for play, centers, or recess. We all know that children's toys can cost an upwards of hundreds of dollars brand new, so donating these items to a local teacher can really help them build or enhance their classrooms.
Donate locally
Donors Choose
One of my favorite online fundraising websites for educators is Donors Choose. I've used them previously when I taught in VA and love that the organization has grown and you can see their influence in everyday classrooms across the country. Major businesses and companies are now partnering with Donors Choose by matching donations! Just recently I had a project completely funded because an organization was doubling donations for basic resources for my classroom!
 |
| Support our class on Donors Choose! |
You can simply look up your state and see what classrooms need support in your local area. I love finding those projects that need just $25-$100 more dollars to be completely funded and donate to them. It is a special thing to see that complete strangers (or often other teachers!) are donating to your project simply because they believe in supporting the educators in their state or district.
Any project that is fully funded is ordered directly from the retailers that the teacher selected, then the items are shipped directly to the school. All items purchased through Donors Choose then becomes the property of the school, not the teacher. So, in a way you're supporting other teachers at that school too!
This happens to be one of the easiest ways you can support a teacher this year and if you're interested in keeping up with the various projects that need support in my classroom, feel free to pop on over to my Donors Choose page! Just your consideration means the world to me and my students!
Go Fund Me
You can also check out GoFundMe, which is another popular fundraising website that teachers use to raise money for various projects. The difference between this platform and Donors Choose is that the money donated is directly deposited to the teacher. This is a great option when you want to donate to a specific person you know! I have a number of teacher friends who whose GoFundMe to help raise money for their classrooms to buy materials and resources.
Fair pricing for teachers
Facebook Marketplace has recently been a great place to find everyday people selling their stuff - and a lot of things I could use for my classroom! However, the problem lies in that for that play kitchen they want almost what they paid retail for and after messaging them to explain my situation, they're unwilling to negotiate or offer any fair pricing for teachers.
Look, I understand when we want to sell our old stuff, and items that we paid quite a bit for, we want a little bit of a return. I totally get it! However, I just want everyone to consider that when selling an item and the person interested is a teacher looking for items for their classrooms, be willing to at least negotiate a price that is fair considering that teacher is already purchasing things for their classroom elsewhere and out of their own pockets. We greatly appreciate that!
Donating is tax deductible!
Not only does it feel good to support teachers, it's also financially beneficial to you come tax season! Because donations to fundraiser platforms like Donors Choose are considered charitable donations, each donation you make is 100% tax deductible! So, keep track of your donations and present them when filling out your taxes for 2018.
However, be aware that using other crowdfunding sites like GoFundMe to support teachers aren't guaranteed to be tax deductible because the IRS considers it to be a "personal gift" not a "charitable donation"- but I'm sure you can bring this up to your tax professional and see if your donations qualify.
--
No matter what you decide or how you choose to support a teacher this year, the fact is is that you're doing it! There are so many causes to give to and spread the word about, but year after year teachers are often left behind because there's little support in education policy in general. So, without getting too political here, I just encourage each and every one of you to consider supporting just one local teacher in 2019. If you can support two or make recurring donations all year long that's even more amazing!
I wish everyone such a happy New Year and a prosperous 2019!

Subscribe to:
Posts (Atom)
Hey there!
