
April 25, 2020
How I Create Distance Learning Videos in iMovie

This post may contain affiliate links where I will earn a small commission.
You can read my full disclosure policy here.
You can read my full disclosure policy here.
I've received a lot of praise concerning the videos I've been making for my students during distance learning. Our school has been away for more than a month and it looks like we'll be finishing the year this year. A huge bummer, but necessary in order to keep our student families and communities safe.
We've also gone live with instruction and unfortunately for me, I'm not available during the day to host live sessions due to having my son and managing his schedule and services he requires for his ASD. Since I'm missing out on that time (I have amazing assistants helping me with the live sessions!) I make these videos to help supplement me not having that face time with my students everyday.
Disclaimer: I am not a fancy YouTube specialist nor do I claim to be. My tutorial today is for the everyday teacher who uses what's on hand. If you want to get serious and invest in anything, that's completely up to you. I don't have that interest or budget...but to each their own!
Equipment & Software
In order to create simple videos that will impress your students you'll need a few things to pull it all off. Here's what I use:- 13" Macbook Air
- IPEVO document camera (that's what my school has)
- Visualizer app (download from Apple app store)
- iMovie
- PhotoBooth
- Headphones with a microphone
- Canva (to create the graphics)
- *optional: ring light
Of course, you can use whatever technology you'd like, but this is my setup at home that produces the videos you see on my YouTube channel and what I send to my students. You can always upgrade these items through a simple search on Amazon or inquiring with your school to see what they have available.
Lighting
Much like with your photos, your videos are going to need the best lighting so that your end product are clear and visible for your students. In my apartment we get ample sunlight during the day, which is a great time for me to begin recording my videos. However, a ring light or something similar is a great (and an affordable option) for those who don't have natural sunlight as much as others.Once you get yourself set up with the right lighting and your tech is ready to go...you're ready for your first step in creating your video: recording!
Recording your videos
The first step in creating your videos is having your content ready to go. This could be your books for the read aloud, any anchor charts you want to hang in the background, or handouts you want to model. Think about what you want your video to be about and have those items prepped.
Using PhotoBooth or Visualizer App
- To record my intro videos I use the PhotoBooth app that comes pre-installed on my Macbook. I then drag the video to my desktop where it saves as an mp4 file.
- To record my modeling videos for assignments or my read alouds, I use my IPEVO document camera and the Visualizer app. This gives my students a birds-eye-view and keeps my hands free to model or read pointing 1:1.
- Within the Visualizer app I record using no sound. I'll add my voice over in the iMovie app.
Pulling your videos together in iMovie
Once I've recorded everything I need for my videos I open iMovie, another app that is pre-installed on my Macbook. iMovie does take a little bit of time to figure out, but with a little fiddling you'll get the basics very quickly.Step 1: Open iMovie and click on "Create New"
This will launch a brand new project in iMovie and it will give you the choice of Movie or Trailer - choose movie.

Step 2: Utilizing the Features
iMovie gives you a few different features that will enhance your video. They are:
- My Media (where you'll upload your recorded videos from earlier)
- Audio (the optional background music)
- Titles
- Backgrounds
- Transitions (how your media transitions from one slide to the next)
I personally only use everything except for Backgrounds - I have no need for them.
Step 2a: My Media
In this step, you should drag and drop the mp4 files that you recorded earlier directly into your project like it prompts you. I add a cover graphic that I created in Canva first, then my intro or content videos. Once I have my media in my project how I like, I'm ready to add background music.

Step 2b: Adding Music
This step is optional, but adds value to the overall quality of your final work. You can upload and use whatever music (i.e. from your iTunes) you want, just be wary of copyright if you plan to share the videos publicly. I stick with the included songs in iMovie, which are:
- Playful
- Simple
- Travel
The other songs are a bit intense, but depending on your project you may want to use them. This is where you can play around with the vibe you're trying to achieve.

As you can see, I have my graphic first, then my intro video, then my content video (in this case a read aloud). When I'm ready to add the music I want I drag and drop it into the space under my uploaded media (it'll appear as green).
Keep in mind: each audio clip is only about 1 min-2 mins long, so you'll simply copy and paste it for the length of your video.
Step 2c: Recording Your Voice Over
This is a fairly easy step once you get the hang of it. The great part is, if you hate it you can always delete that recording and start again.
Tip: Use headphones with a microphone to drown out background noise. Being a mom at home with a preschooler it's tough to find a quiet place in my house. But, my headphones with a mic really do help drown out unwanted noise.

When you're ready you'll click the microphone icon and it'll count down from three then begin recording. The media file will also play and I simply record my voice over it, in this case the text from the read aloud.
Tip: don't do one lengthy recording - rather, break it into pieces. It's easier to edit that way.
Step 2d: Editing your voice over and background music
Okay, so far you're doing amazing! See...once you play around with it, iMovie isn't as terrifying as it looks! Right? ;)
The next step is to edit and balance the background music and your new voice over. Obviously, the most important audio file is your voice over that is explaining the work or reading of the book. So, we want that to be the loudest.

Take a look at your voice over. It'll be the box above your music bar. There will be a line where you can toggle it up and down. This determines how loud or soft you want the audio file to be. For my videos, I turn it all the way up to 200%. I do this for ever voice over file in my project.

Now, I'll need to adjust my background music. I'm going to do the same thing: toggle this line but down to between 2-5%.
You can edit your music and voice over files however you wish, just make sure your voice stands out and it's drown out by any music you put in there.
Step 2e: Final Touches
This is the last step in iMovie to create your video! You have all of your media and audio files in, you've completed your voice over, and adjusted and fine tuned your background music. Now, it's time to add transitions and/or titles.

Transitions
A transition is another way to add simple things to your work that will improve the overall quality! So easy to do!
Just click on the Transitions tab and you'll notice a library of transitions open up. Find the one you want and simply drag and drop it between your media files. You'll see I use transitions between my opening graphic and intro video and one between that and my content video.
Titles
You can use titles however you'd like, I only use them at the beginning of my videos to display the topic for that particular video. It can be the name of the read aloud, the skill I'll discuss...anything. Just like Transitions, a library of titles will pop up and you can drag and drop the one you want. It'll show up as a purple box.
To edit it, just double click and change the text.
Saving and Uploading to YouTube
The most exciting part in all of this is when you've completed your project and you're ready to share it! Not every video needs to be automatically uploaded to a service like YouTube, so you can simply save it to your computer. Depending on the length of your video and how large it is, it may take a few moments so be patient.
In the upper right hand corner of iMovie you'll notice an upload icon. Click this and a menu pops up with how you'd like to save your project. Most often I upload it straight to YouTube so I don't have to save the file and use the space on my computer. I recommend that for those who have YouTube channels they want to upload their work directly to - it simply cuts out the step of manually uploading the video. However, if you plan to use your project in a different way, then saving it as a File to your computer is your best option.
The final cut
Here's my published video that I will send to my student families for a distance learning lesson on making inferences. You'll see how each step is pulled together to create a simple video for students.
To make the cover for my videos:
And there you have it! I hope this tutorial is enough to get you started...there are a TON of videos online of more in-depth ways to work with iMovie. For me, this process works and I'm all about working smarter, not harder.
Watch this tutorial in action!

Happy producing!
April 23, 2020
Plants & Gardens Unit | Snails

This post may contain affiliate links where I will earn a small commission.
You can read my full disclosure policy here.
You can read my full disclosure policy here.
This week we're officially on spring break and it couldn't have come at a better time. Although this spring break does look a lot different than the one we had planned. We had to cancel our trip to Texas to visit family and even though I'm on break, my day-to-day routines haven't changed very much. I still wake up (admitting, later than usual) and find myself managing time between a full day with my son, checking email, and finding time to do things for myself in between.
However, now that I've found this new sense of time I thought it would be fun to finally get on here, spruce some things up (did you notice the slight website theme change??) and share what my kinders and I have been up to leading up to our break!
Exploring Spring
Spring had sprung a couple months ago and in English class with my kinders I took full advantage and kicked off our spring ELA theme! There has been so much learning, exploration, and fun these last couple of months - with this last month being our first with distance learning. If you've been following along, we've covered:And to wrap up our spring theme last week we learned about snails!
Snails! Les Escargots!


One of the awesome aspects to working at a French-American school is that I am exposed to a whole new way of teaching. From instruction to curriculum and, as a teacher, it's been amazing to learn and observe my French colleagues teach. With that being said, one unit in particular that I was most curious about was....snails!
Snails?
Yes, snails.
This was a first for me and I couldn't wait. Typically in kindergarten there's always a unit on life cycles and a popular life cycle to study, in my experience, has been with butterflies. They're easy to manage, the kids are excited to have new visitors in class, and they get to observe life happen right in front of their eyes over a few week period. However, at my school in kindergarten they learn about snails!
Over the last month (even with distance learning) I've found myself really enjoying this unit. From the days prior to schools being cancelled and seeing the kids light up as the terrariums were set up in the classroom to observing the first batch of eggs that were laid. Although much of their snails unit in French has been online, it hasn't the learning and excitement around these little creatures.
Snails and ELA

In English, students will use their background knowledge about snails to assist them in their understanding of the English language through read alouds, vocabulary work, phonics activities, and crafts. Meanwhile, students are beginning to learn about how to reflect and connect to their reading. Which brings me to our reading focus for the week...
Making text-to-self connections!
We're at the part of the year where students have really built upon their understanding of story foundations such as: story structure, story elements, who the author and illustrator are and their purposes, as well as
For distance learning purposes I decided to create a YouTube channel for my students. On this channel I have read alouds, handwriting, and activity explanations. This has been an extremely helpful platform to use for distance learning because of how easily I can create content, upload it directly from iMovie, and even share the link via my class' Seesaw.
For example, as we launched our text-to-self connections during garden week I created this video to introduce my students to the concept of how we can relate to the stories we read. I included this video as well as the read alouds (also found on my channel) in my lesson plans so that my students could find everything needed for specific lessons.
Reading Skill: Text-to-Self Connections
Because my French colleagues taught the science component of this unit, I wanted to focus on the language arts aspect with English vocabulary and developing their abilities to relate to the stories they read with text-to-self connections. We've been working on these kinds of connections and snail week will be our final one. It's one of the easiest for students to grasp and therefore the first one we tackled. Here's how I blended our unit on snails with ELA skill-building!Reading: Text-to-Self Connections
I used this freebie from Camp Kindergarten all week with my read alouds and activities. It's a great visual organizer for my kinders and gives them plenty of space to draw pictures - it's also a great tool to upload to Seesaw as an activity. With making connections, students would read (or listen) to a story and then draw a picture using details from the story and their own memories connecting the two.
 |
| Photo | Camp Kindergarten (FREEBIE) |
 |
| Amazon: $10.99 |
 In this story, Escargot is a snail who so badly wants two things in life: to be the readers' favorite animal and to eat the salad at the end of the story. However, when he finally gets to the salad he realizes there's a carrot on it...and Escargot hates carrots! This is the perfect story for my students to practice text-to-self connections because who are the world's pickiest eaters?? Kindergartners!
At the end of the story Escargot tries the carrot and realizes it's not as terrible tasting as he once thought - thanks to the encouragement from the reader! This story allows my students to relate to Escargot and his unwillingness to try a new food by sharing a food they were once scared/didn't want to try.
The great thing about this story is that there can be other connections made. For example, text-to-text with Green Eggs and Ham by Dr. Seuss!
 |
| Amazon: $9.99 |

Norman the Slug with the Silly Shell by Sue Hendra tells the story of Norman, a slug, who so BADLY wants to be a snail because they have cool shells (slugs do not). So, he goes on an adventure to find the coolest snail shell - from a tennis ball to an alarm clock and many other items in between. Norman learns the valuable lesson of accepting yourself just the way you are! Another great read for making connections!
In addition, this story has a great SEL opportunity as well with: self-esteem, appreciating your own uniqueness, and understanding we're perfect as we are; that we should pretend to be something/someone we're not. There are a ton of stories with this message that can be used for text-to-text connections in addition to this one!
In addition, this story has a great SEL opportunity as well with: self-esteem, appreciating your own uniqueness, and understanding we're perfect as we are; that we should pretend to be something/someone we're not. There are a ton of stories with this message that can be used for text-to-text connections in addition to this one!
Snail Crafts
 |
| Photo | Toddler at Play |
Fine Motor Practice
This is a great opportunity to have students work on their swirls and rounds. This skill lends itself to muscle development in the hand and that contributes to more control when forming letters and writing. I planned on the letter of the week being "O" which lent itself to further practice of rounds.
 |
| Photo | Messy Little Monster |
 |
| Photo | Fiche-Maternelle |
Playdoh Snails
Working with playdoh (we made ours at home!) is a great way to build up fine motor skills, but it's great for expression of creativity as well! Greyson really enjoyed making homemade playdoh with me and I've been enjoying the hours of play...
For Fun: Snail Racing!
 |
| Photo: Kids Craft Room |
And that's a wrap for our snails unit!
March 29, 2020
Jack and the Beanstalk Workbook + Giveaway

Amazon affiliate links may be used within this post.
My kinders and I are heading into our third week of distance learning. It's been a very busy and evolving time as a teacher because I'm having to anticipate what materials to provide and how. I haven't started any live classes yet, but have been providing a schedule and lessons with activities for parents or caregivers to use while at home. Distance learning has been difficult with such a young age group and I'm personally having to do this for the very first time in my career.
With that being said though, the hard work and stress has been worth it because I feel as though I am becoming more resilient as the weeks go on. I'm creating meaningful activities for my students and even though I can't be there with them their parents are sharing so much with me about what's working and what they'd like to see more of.
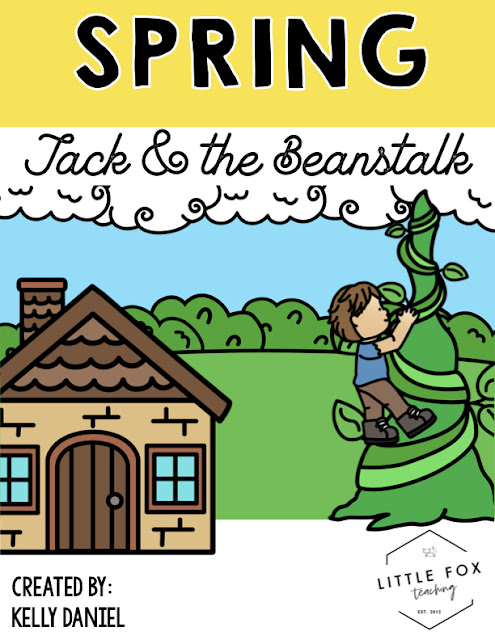
This coming week we're continuing our unit on Spring with seeds and plants and using the famous fairy tale, Jack and the Beanstalk! This is a great continuation of our unit and this story is a great way to introduce and practice key reading skills like sequencing, the genre of fairy tales, responding to reading, and comparing variations of the same story. It's even a great way to discuss point of view!
Here's a peek at what's included in this Jack and the Beanstalk ELA Workbook!
The OG
We are all familiar with the original fairy tale, Jack and the Beanstalk. It's the story of a young, poor boy who saves his livelihood by venturing up a beanstalk and steals golden items from an unfriendly giant looking to eat him. Of course when you step back and look it's a pretty grisly story, but it lends itself so much to a variety of reading skills and comprehension.There are so many versions of this story (which also makes it a great choice as a mentor text), but I chose the one I readily had on-hand here at home.
Using Shadow Puppet for read alouds.
One app that a colleague of mine shared with me as we began having to teach from home is Seesaw's companion app, Shadow Puppet. It's been a wonderful resource to create my own, simple, read alouds for my students to listen to while at home. It's so easy to use: just snap pictures of each page then open the app and select those photos. You can choose background music (or not) and begin recording your voice as you read. Once you're finished you can share or upload it anywhere! I chose to share mine on YouTube with my students to make it accessible and easy. Feel free to grab the link to these read alouds or make your own!
Sequencing, Sequencing
our reading, even before schools closed, we've been working hard on sequencing. It's a great skill to learn because we sequence so many things in and outside of reading. In math we have ordinal numbers and positions, in science we know seasons are sequenced throughout the year, and so many other examples can be found if you look close enough. So, I love adding a few sequencing activities into my workbooks to keep this skill fresh and allow my students to practice in a variety of ways.
Story Sequencing
In our first story, an original retelling of Jack and the Beanstalk, the plot develops in a predictable way. You don't need this specific book, but use one that follows the same events as the original fairy tale. I wanted to keep the sequencing simple since my students will be completing this at home. I chose 5 main events that are key to the original story and made this part a cut, sort, and paste activity.

Students simply cut out the picture cards, color them, then glue them in order from beginning, middle, and end. My students have been working on this since the beginning of our Spring theme, so it's an easy to follow activity that requires minimal assistance from parents at home.

Another great way to sneak in some sequencing is with a seed life cycle sort. My students completed a similar activity in their previous Seeds and Plants workbook from last week, so they should be already familiar with how to do this. What's more, is that this is a great way to connect their learning from science into language arts.
Point of View
Point of view is a complex concept for my kinders to truly understand, but there's no harm in introducing the concept that characters have opinions about other characters. The story, Trust Me, Jack's Beanstalk Stinks by Eric Braun is a wonderful variation on the original story. It is a funny take of the events in Jack and the Beanstalk because it's from the perspective of the Giant!
For distance learning, I've uploaded my own read aloud of this story for my students to use during this part of their workbook. Feel free to use it for yourself or your own students! Although I can't be there in person to see my student's get a kick out his version of the story, it's a great read aloud nonetheless to discuss point of view in their reading.
Phonics Practice
Reading these stories have helped my students not only with their reading comprehension, but it's a great story to help with phonics, too! As we continue to learn the alphabet and their sounds, this unit introduces the soft sound of G. It sounds like /j/ like Jack, but words like /g/iant have a different sound! This is an optional activity and is dependent on your grade level. In kindergarten this week, I've planned for our letter of the week to be Jj (to align with our character, Jack) and the phonics practice to be the soft g sound (as seen with the character, Giant). It came together so well!
Comparing and Contrasting
Much like in our Winter unit with The Mitten, I love reading variations of the same story and having my students practice comparing the details in each. For Jack and the Beanstalk, students have details and events from the original story and the story as told by the Giant's perspective. We've worked with a Venn Diagram before, too, and it makes another appearance as they sort each event.
Creative Writing
I love giving my students the opportunity to work on their writing skills. I've placed a couple of creative writing prompts in this workbook to help kickstart those creative ideas for my students.- What would you find at the top of the beanstalk?
- What would grow if you planted a jellybean?


Before you go, grab this resource for FREE by entering our giveaway! Ends 4/6/2020!
a Rafflecopter giveaway
March 27, 2020
A Seeds/Plants Unit Workbook
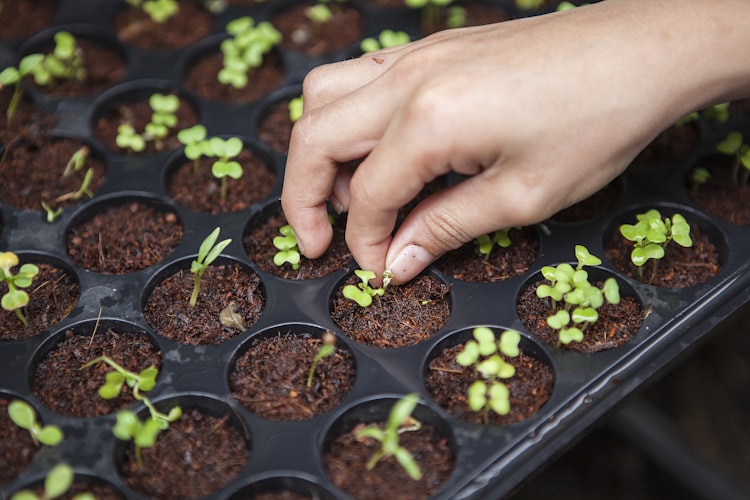
It's kind of insane how in just 24 hours everything can change.
One moment my colleagues and I were just beginning the discussion of preparing for distance learning for a few of our students who decided to take precautions and stay home...to...school being shut down until further notice.
Then all of California began to slowly shut down...
...then social distancing turned into shelter-in-place.
Thankfully everyone I personally know, and my own family, are safe from Covid-19. I respect the precautions that our state (and country for that matter) is taking during such an uncertain time. The most all of us can do is to stay indoors for the protection of others. However, being home for the first week with my 4 year old and husband (who is also working from home) has proven interesting.
Nonetheless, my kindergarten team and I have been working tirelessly to create distance learning activities and lessons for our students. It's been a challenging task at times but not because of us putting together our plans, but the roadblocks that come from higher up. However, that's a different conversation for a different day.
Today, I wanted to quickly share out a new workbook that I created for my students while we're away from the classroom. We launched our seeds/plants unit and knowing I (and my students) wouldn't have access to a lot, I created a workbook that includes the activities that we would have covered in class. It's easy prep for parents as the only thing they need is to be able to print and have WiFi to access videos.

Incorporating Seesaw
This week our team expanded the use of Seesaw for students to use to interact more and to share their learning while at home. We informed our student families that not only would we email their weekly lessons and activities, but that additional activities will be uploaded to Seesaw for them to complete. This is a great option for the social interaction, but also for those parents who don't have a printer at home.Seesaw already has an extensive collection of assignments for all grades and creating my own is a breeze. It's been fun to see how my students are engaging with me and the work and I look forward to doing more with them.
For our seed/plant workbook, I periodically upload a page for students to respond to. For example, the first activity is labeling and coloring the part of a seed. I uploaded this page from their workbook and allowed them to snap a photo of their workbook or have the option to complete this part via Seesaw by filling in the blanks right there. I've enjoyed, so far, the capabilities of Seesaw!
Utilizing YouTube
By no means am I a YouTuber or even want to be. I don't like being recorded and I certainly don't like videos of myself. However, in times like these where distance learning is thrown into my lap I have to do what I can to be there for my kids. So, I created a YouTube channel! It's nothing fancy...but it's a platform where I can share my read alouds that I've created using Shadow Puppet.After I create my videos using the app, I simply upload them to YouTube and share the link in my lesson plans to parents. Again, nothing fancy or impressive...just simple videos for the stories I'm using as a part of my seeds/plants unit. You can check a few of them out here:
Guess That Seed!
To make this Seeds & Plants unit a little more fun, I've been rummaging around my kitchen to find different seeds to share with my students on Seesaw. I then upload the pictures as an 'activity' for my students to guess the kind of seed it is. They've come up with so many different, and unique, answers! I like getting a little tougher each week first beginning with the big seed then this last week I found these tiny seeds.
Here's a peek at what I've sent. Can you guess what they are?

The Spring Collection
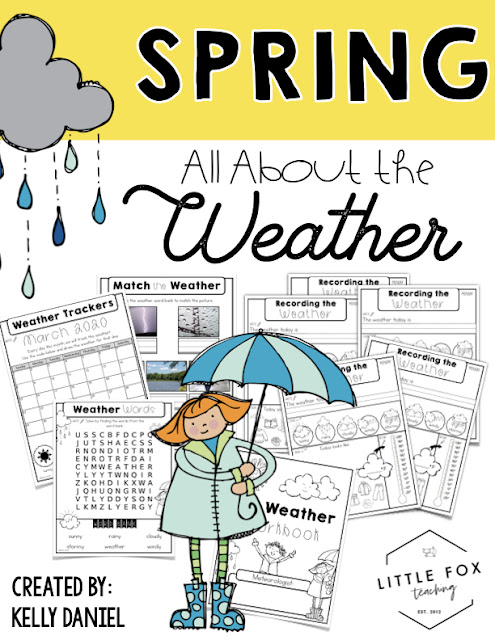
This seeds/plants workbook is one of a few resources I'm building as a part of my Spring Collection. We began with our unit on weather before jumping into plants and life cycles. I found this to be super helpful in building their schema since weather also operates in a cycle. It also gave my French colleagues time to introduce seeds/plants to them as we purposefully staggered our lessons to complement each other.
March 2, 2020
Wondering About Weather in Kindergarten

Amazon affiliate links are used within this post.
I will earn a small commission on each purchase using my links. Thank you for supporting my blog!
I will earn a small commission on each purchase using my links. Thank you for supporting my blog!
It's March which means we're right on time to celebrate the seasons changing - even if Southern California wants to be stubborn and go back to chilly weather.
Either way, my bilingual students are in for a fun week as we explore all things weather!!
Kicking off our newest unit on weather this week, I've created a wonderful little companion workbook that'll help keep my kids on track and their work safe as we learn all about...
- The job of meteorologist
- The tools meteorologists use to study the weather (with a focus on a thermometer)
- How to record the temperature and reading a thermometer
- The 4 seasons (and sequencing them!)
- Tracking the weather all month long
- Tracking the weather Monday-Friday
- Sorting weather words
- Weather writing prompts, read aloud reflections
- Weather Word Search
- and more!
What is a meteorologist?
In launching our study of the weather it's only right to discuss and introduce my students to the profession of meteorology - both as scientific researchers and news weather reporters. I mean, it all starts here. Next, we'll discuss the tools meteorologists use with a focus on thermometers. They'll learn to read and record the temperature using the practice thermometers in our workbook
Tracking the weather all month long
I'm excited to tie in a little calendar work with my kinders as we discuss the weather patterns each day. It's a great time to review English vocabulary around days of the week, how to read a calendar, and use a key to record the weather each day. I also can't wait to discuss the word 'predict' and how we can make guesses both in our reading, but also in how we can use clues to predict the weather.

This month long tracker is for March 2020, but I do have an editable section where you can overlay your own calendar to match the month you plan on teaching this unit.
Also, I've included daily recordings where students practice key skills such as sentence writing using weather vocabulary, creating drawings with details to convey a message about the type of weather, demonstrating their understanding of weather patterns and what to wear, and finally how to record the temperature using a thermometer (a link from the beginning of the unit).

The Four Seasons
Although we don't experience the same kind of weather during each season as other places in our country (or around the world), it's a great introduction to students nevertheless! In order to build upon their knowledge later on, I like beginning with seasons and how weather during those seasons look and feel different - and even moreso around the world where there are different climates.

This section is all about introducing my students to the four seasons throughout the year. Key vocabulary include the seasonal words, concepts of a cycle, and tie in their schema about temperature and how that affects the environment during each season. I've created this flip book style page where students cut and glue their flip pages and reveal the trees underneath where they'll fill in the colors associated with the weather during that season.
Thus far in kindergarten we've learned about the desert and the arctic in which we've had in-depth conversations about environmental and animal adaptations. This will be wonderful background knowledge as we discuss a little more about how weather also impacts those habitats and these adaptations. #winwin
Season Sequencing
Students demonstrate their understanding of the four seasons and cycles (lending to our next unit on life cycles!) by cutting and pasting the seasons in order as they happen during the year. I like starting the cycle with Winter since we just wrapped up our themed unit on winter - it only seemed natural. But, feel free to have your students start with whatever season you are in when you're teaching your weather unit.

Drawing the Seasons
In this section I use paint with Q-Tips (or simple markers) for students to draw what each tree looks like during that season. It's a variation of the popular activity and I thought a fun activity to include!
Teacher Tip: Use these plastic containers like these to store paint! Since I travel from class to class, this helps keep the mess to a minimum and allows my students the use of paint for English activities!


Although it makes for a pretty thick packet, I'm super excited to use this as a means to track my student's learning and cut down on the missing papers. Plus, it's flexible in that you can pick and choose what activities you'd like to include in a workbook and which ones you'd prefer to have as individual handouts. Either way, it's going to be a fun week wondering (and thinking!) about weather!


Subscribe to:
Posts (Atom)
Hey there!
